Enable Libkey Nomad to automatically install to Google Chrome
Answer
Step 1: Install Google Chrome policy template
1. Copy chrome.admx, google.admx, and chrome.adml, google.adml to their appropriate folders via USB. If you don't have access Download the Google Chrome policy template. Click "Accept and Download" under "Policy Templates" to get Policy_Templates.zip
2. Unzip the bundle.
3. Copy
\policy_templates\windows\admx\chrome.admx
and
\policy_templates\windows\admx\google.admx
to
C:\Windows\PolicyDefinitions\
4. Copy
\policy_templates\windows\admx\en-US\chrome.adml
and
\policy_templates\windows\admx\en-US\google.adml
to
C:\Windows\PolicyDefinitions\en-US\
5. Once complete, a Google Chrome folder will appear under (Start > Run: gpedit) Group Policy Management > Computer Configuration > Administrative Templates.
Step 2: Configure in Management Console
1. Navigate to Start > Run: gpedit.
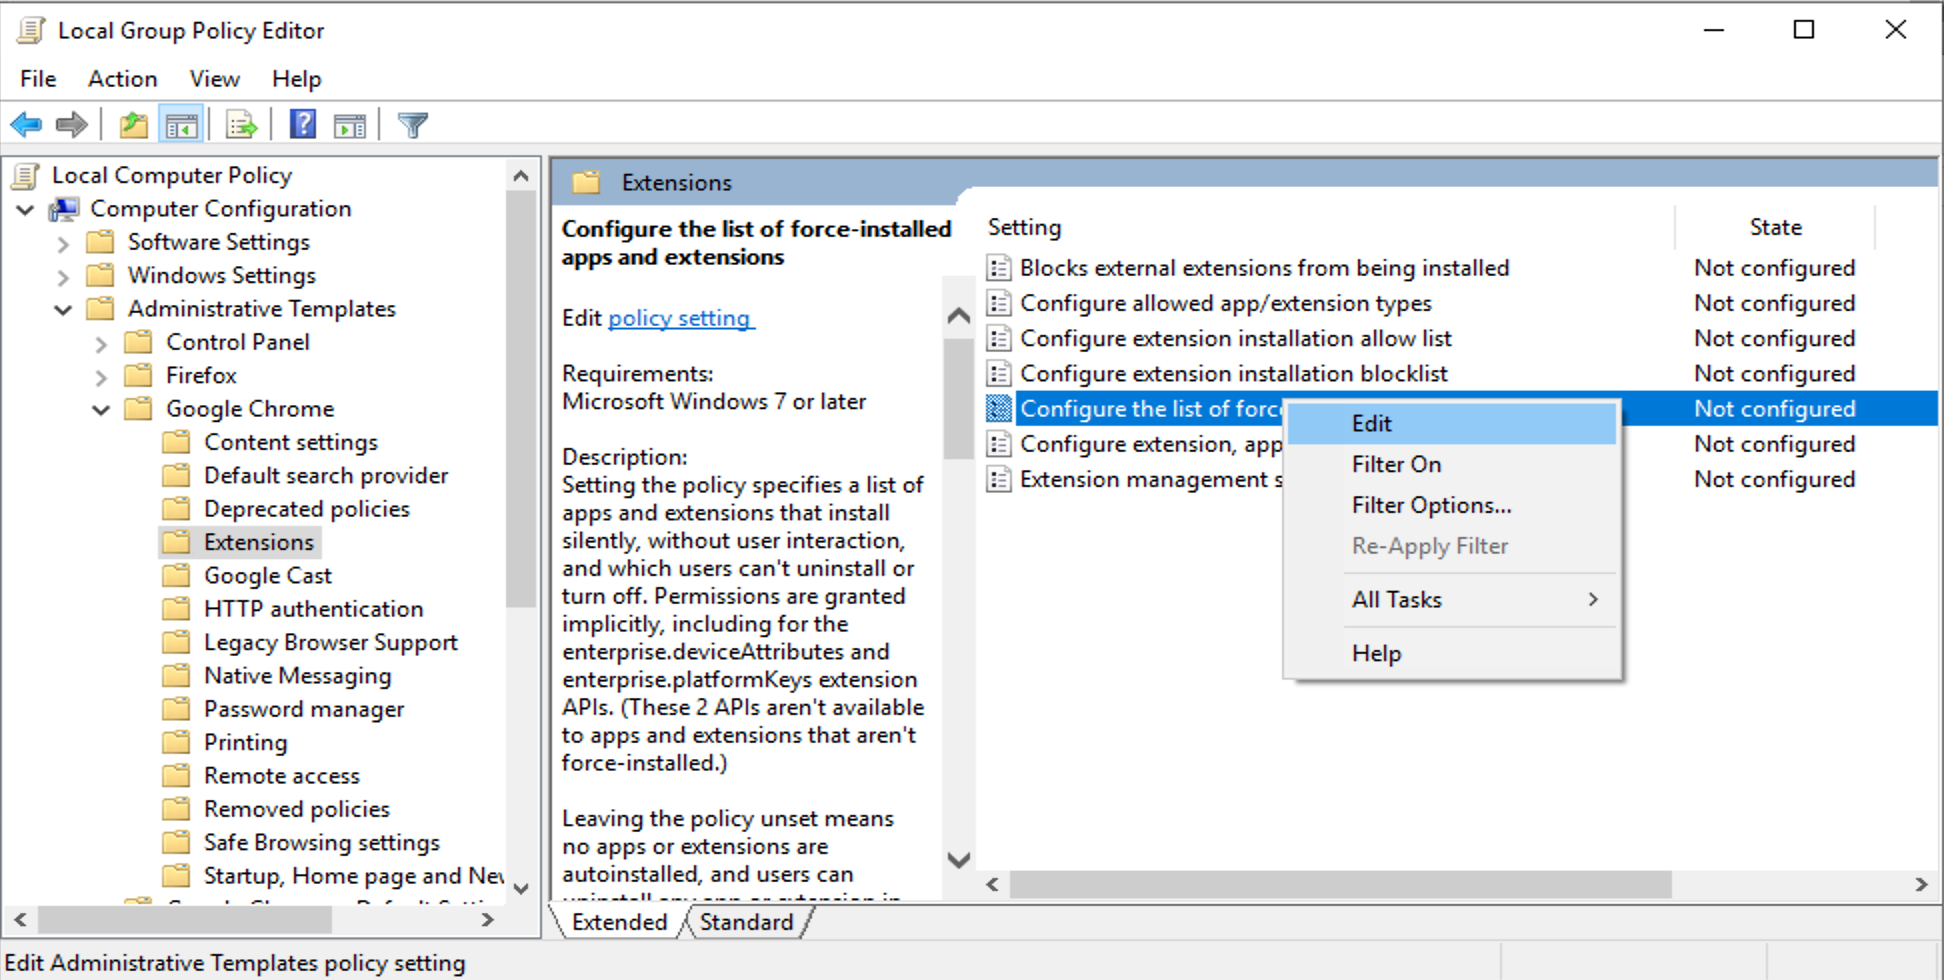
2. Navigate to Group Policy Management > Computer Configuration > Administrative Templates > Google Chrome > Extensions
1. Navigate to Start > Run: gpedit.
2. Navigate to Group Policy Management > Computer Configuration > Administrative Templates > Google Chrome > Extensions
Right click and Edit the “Configure the list of force-installed apps and extensions”

Step 3: Enable Nomad to automatically install to Google Chrome
1. Tick the Enabled button, and then click the Show button.

2. Add the following entry for LibKey Nomad and Click OK.
lkoeejijapdihgbegpljiehpnlkadljb;https://clients2.google.com/service/update2/crx

3. Click "Ok"
4. Click "Apply" and then "Ok"

Step 4: Tell Nomad your libraryId so it can be automatically detected
Using the follow command in cmd as administrator and run it.
REG ADD HKLM\Software\Policies\Google\Chrome\3rdparty\extensions\lkoeejijapdihgbegpljiehpnlkadljb\policy /v libraryId /t REG_SZ /d 599 /f
The result should resemble the following:


